Thursday, July 31, 2014

Analyzing Samples


Every day for two weeks now, we’ve been harvesting with two of our graduate students. Each day we process anywhere from 300 to 1000 plants (check out my post called The Harvest Begins for details) and ultimately, after the tests are done and the data is recorded, the plants –or parts of the plants –are put into paper bags, marked with the test and plot number, and then stored in a dryer. They stay there for around five days and then the fun begins… The fate of all the dried samples is to be crushed into a powder then analyzed. This involves a two-step process: grinding and scanning.

Wiley mill
To grind the samples down into the powder that will be scanned, we use a Wiley mill. Basically, rough pieces of the dried plants are put into a hopper on the top of the mill which leads to a chamber where rotating blades collide with stationary blades. The sample is pulverized between the blades and the ground up plant can then fall through a screen plate at the bottom of chamber and is collected in a receptacle below. After the sample is ground, it is stored in a plastic container to await scanning.

Grinding is one of the necessary evils of my job and probably the task that I enjoy the least. It’s loud and it’s hot. Also it’s just the nature of the beast that while the mill is grinding, the powder gets kicked up into the air. To prevent breathing it all in, we do wear respirators. However, because the room isn’t air-conditioned, you’re covered from head to foot in sweat –which of course the powder adheres to. It can definitely get unpleasant, especially since the powder-sweat combo is irritating to the skin. Like I said, very unpleasant.

The next step in the process is scanning. We use a near-infrared scanner to analyze the ground up samples. Basically, the NIR scanner emits near-infrared light which hits the sample and is both transmitted and reflected. The machine is able to detect how the light acts and can then report the composition of the sample. This is done for each of the samples that we take. For more detail on how this works exactly, you can check out this pdf done by the genetics group here at A&M: http://maizeandgenetics.tamu.edu/SethCMurray/Teaching/Lectures/NIRS%20class%20V3.pdf
The NIR room

Scanning, unlike grinding, is for the most part an easy and pleasant job albeit a repetitive one. The sample is loaded into a round disk that is glass on the bottom. It’s then placed in the scanner for it to do its magic. And that’s pretty much it, other than making sure to clean the disks properly and not leave smudges on the glass surface.

Well, my internship is almost over, August 1 is the official last day. Check back to see my final post.


References


Monday, July 28, 2014

Counting Seed


Texas weather is so finicky. We’d gone quite a while without any rain –long enough that it became necessary to irrigate our fields –and then in one night, we got rains of biblical proportions. Luckily, the rain came before we really started harvesting, so it wasn’t crucial to get out into the field. Instead, we spent the next day in the lab catching up on other tasks that needed to get done. As we harvest, the plants will get processed and analyzed in a variety of ways. The biomass that is collected will be grinded down into a powder that is then scanned using a near-infrared scanner, which gives the composition of the sample. The panicles are threshed to separate the seed from the stem and are then packaged and stored from for the next planting (I’ll go into greater detail about these processes in my next post).


The seed counter
 

I myself was counting seed for a graduate student. It’s not nearly as bad as it sounds! We have a machine that makes counting by hand a thing of the past. The seed counter has a bowl with an inclined plane that winds around the inside. The bowl vibrates which works the seed up around the inclined plane and into a chute from which the seed is counted and then falls into an envelope at the bottom. It’s a nifty contraption because it can be set to only allow a certain amount of seed to drop into each envelope. It’s simple, but the seed counter saves a lot of time!

Check back soon to see what we’ll be getting up to in the next few weeks. We’ve already begun harvesting, but soon the load will increase exponentially as we work to harvest all the panicles that we placed bags on earlier in the season.

Wednesday, July 23, 2014

Taking Notes


Exertion: flag leaf to panicle
Being a breeding program, naturally part of the job is to take phenotypic notes on the plants as they grow, everything from days till flowering to how much head smut is found in a plot. As a student worker, I’ve helped take some of the notes, mostly quantitative data, which will then be analyzed later. The majority of the notes that I helped with were of the height and exertion of the plant. Taking the height is as simple as it sounds: we use a height stick with inches to measure several plants within the plot, then take an average. Exertion is measured from the flag leaf to a notch right below the panicle. The exertion, which is also measured in inches, is a bit harder to take, simply because the plants in a plot can vary significantly. The more experienced you get at taking notes, the faster it becomes at judging an average for the plot.

 
This was done for most of the plots in our fields. It’s a very easy process, but with so many plots, it took quite a while to get it all done. What seemed to work the most efficiently was to pair up so that one person actually measured the plants and then shouted out numbers while the other recorded the data.


Head Smut
We also took notes in our fields in Corpus Christi, which I was able to help with. We did the usual height and exertion notes, but we also took notes on the percentage of head smut in the plots. Head smut, like sorghum downy mildew, is a fungus. It attacks the panicle and has a very distinctive look. The fungus forms an enlarged, black, powdery-looking mass, so it’s definitely not hard to tell if a plot is susceptible or resistant. Taking smut notes, like height and exertion, becomes faster as you go along and within two days we were able to take notes on both the fields that we needed to.

Check in soon for my next post. Until next time, thanks and gig ‘em!

Friday, July 18, 2014

The Harvest Begins!


This week I had the opportunity to work with a graduate student collecting data for his project. Phenotypic data for energy lines needs to be collected in large amounts, which means the graduate students will need all the workforce they can get.  As with everything in agriculture it seems, there are time restraints on pretty much everything that has to be done for the rest of this season, and from now till the end of harvest, we will be working our tails off to make sure it all gets done.


Stripping the plants of their leaves
For the past few days now, I’ve been working with a graduate who is doing research on lodging resistance. Each day, we take plants from around 80 of his plots and collect the data that he needs for his research. We’ve been starting at 6:00 am, just as the sun is beginning to rise here in College Station. For each of the eighty plots that were being harvested, 3 plants were selected and chopped down at the base (our grad student chose which plants he wanted). The plants were then tagged with the plot number, zip-tied together, loaded on the truck, and taken back to the Borlaug Center for processing.


Taking measurements
The procedure for processing each plant was simple: the leaves were removed from the stem so that the stalk was all that remained. The length of the stalk was then measured and the maturity of the panicle assessed. Next, the third, fourth, and fifth internodes were measured –the length and diameter –and the rest of the plant, with the exception of those select pieces, was removed. The internodes were then cut apart and weighed individually and put onto a mechanical device that would test the force required to bend and break them. Finally, the pieces were placed in a bag, weighed again, and put into a dryer to be grinded down later on.


Internodes
There was quite a few of us, so we were able to set up an assembly line of sorts. By the end, we were working like a well-oiled machine. My job everyday has been to record the data as it was being collected, partly because I can write fast and mainly because I can write legibly. After so many hours of having a steady flow of numbers fired off for me to record, I may go to sleep counting internodes instead of sheep!
 

Working where I do, I come in contact with Masters and PhD students on a daily basis. It’s an awesome opportunity for me because I’m able to have a behind-the-scenes look at what it means to be a graduate student here at A&M, and the grad students in the sorghum breeding program are some of the best around. They’re all extremely intelligent and willing to answer any questions I have about their projects or sorghum in general. I’ve been so fortunate to be able to work alongside these guys and I learn a ton from them every day!


Sunday, July 13, 2014

Hosting SICNA


Recently, I had the opportunity to help host the 2014 SICNA convention which was held at the Texas AgriLife Research and Extension station in Corpus Christi and which was organized this year by Dr. Bill Rooney, my boss and the director of the sorghum program here at A&M. SICNA, the Sorghum Improvement Conference of North America, is dedicated to sorghum development and research in cooperation with universities, the USDA, and the private sector.¹ Close to 100 people attended the conference and represented several different institutions including Texas A&M and Texas AgriLife, Kansas State University, Monsanto, Pioneer, NexSteppe, the USDA, and the Sorghum Checkoff.

A display at SICNA

For the most part, my responsibilities included helping with registration, refreshments, and the meals, but I did have the opportunity to meet some of the bigwigs and sit in on some of the talks. Two of the hot topics in sorghum these days are sugarcane aphids and sorghum downy mildew. I was able to hear talks on both subjects.

In case you may be wondering just what a sugarcane aphid is, it is a very tiny, soft bodied insect that uses its piercing-sucking mouthpart to drink from the vascular tissue of the plant. As you can imagine, this isn’t good news for the plant it’s infesting. Sugarcane aphids are usually located on the lower leaves of sorghum, but on a heavily infested plant, they can be as high up as the panicle.² Not only do they suck the juices out of the plant, as they drink they exude sticky honeydew from their abdomens. This honeydew is often times a breeding ground for black, sooty mold.
Aphids
 

Dr. Raul Villanueva, an A&M assistant professor and extension specialist in Weslaco, Texas, gave a talk about the phenology and control of aphids in the Valley.³ In his talk, he discussed the tremendous damage that aphids caused on sorghum in 2013. They reported up to 50% losses in some areas. Because of this, the EPA granted a Section 18 Emergency Exemption which allowed for the use of Transform WG (an insecticide not marketed for sorghum) to be used on sorghum. Dr. Michael Brewer, an A&M assistant professor working in field crop entomology, elaborated on the use of Transform WG -as well as economic thresholds and IPM (integrated pest management) in sorghum. Both Dr. Villanueva and Dr. Brewer reported that the use of Transform WG on sorghum decreased the aphid populations.


Sorghum Downy Mildew
Sorghum Downy Mildew was the next topic on the agenda. Dr. Gary Odvody, an A&M associate professor of plant pathology, gave a talk about the history of this disease in Texas and its current status. Sorghum Downy Mildew (SDM) is caused by Peronosclerospora sorghi, a fungus. The symptoms can be systemic or local. With a systemic infection, the whole plant is affected. In such a case, the leaves would have white striping down their length and would be narrow and shredded. In a severe case, the plant may not form a panicle or may die. Plant also may only have local lesions that come in the form of dark spots on the leaves. Local lesions aren’t detrimental to yield.

In his talk, Dr. Odvody stated that SDM was first observed in 1958 around the College Station and Beeville area. From then on, SDM has been an issue with sorghum, due in part to its ability to overwinter in the soil for up to two years and also because of the agricultural practice of monocultures. However, there are fungicide treatments for SDM; the most commonly used is metalaxyl.

A good portion of the information that was discussed in the talks was above my head, but I was very pleased to be able to listen in anyway. Having been able to hear about what is currently going on with sorghum and meet the people who are directly involved with it gave me a greater understanding and appreciation for what we are doing in our own fields.

Each day I learn a little more about sorghum and plant breeding, and each day I come home loving my job even more!


References

            ¹ http://sicna.net/


            http://www2.epa.gov/pesticide-registration/pesticide-emergency-exemptions

            http://entomology.tamu.edu/people/brewer-mike/


            ⁸http://agfax.com/wp-content/uploads/sugarcane-aphid-comp-texas-03112014.jpg

Tuesday, July 1, 2014

Crossing Sorghum


Summer is without a doubt here! Temperatures are on the rise, even with the rains that we received last week. The fields are looking great after those showers, though, and irrigating still hasn’t been an issue, whoo hoo! Summer has also brought with it an increase in the bug populations. The sorghum is teeming with all sorts of insects –everything from ladybugs and gnats, to spiders, worms, and grasshoppers of every shape, size, and color. Luckily, the mosquito population has stayed low *knock on wood* and I’m praying it remains so. Now on to the meat of the post.


Paired rows
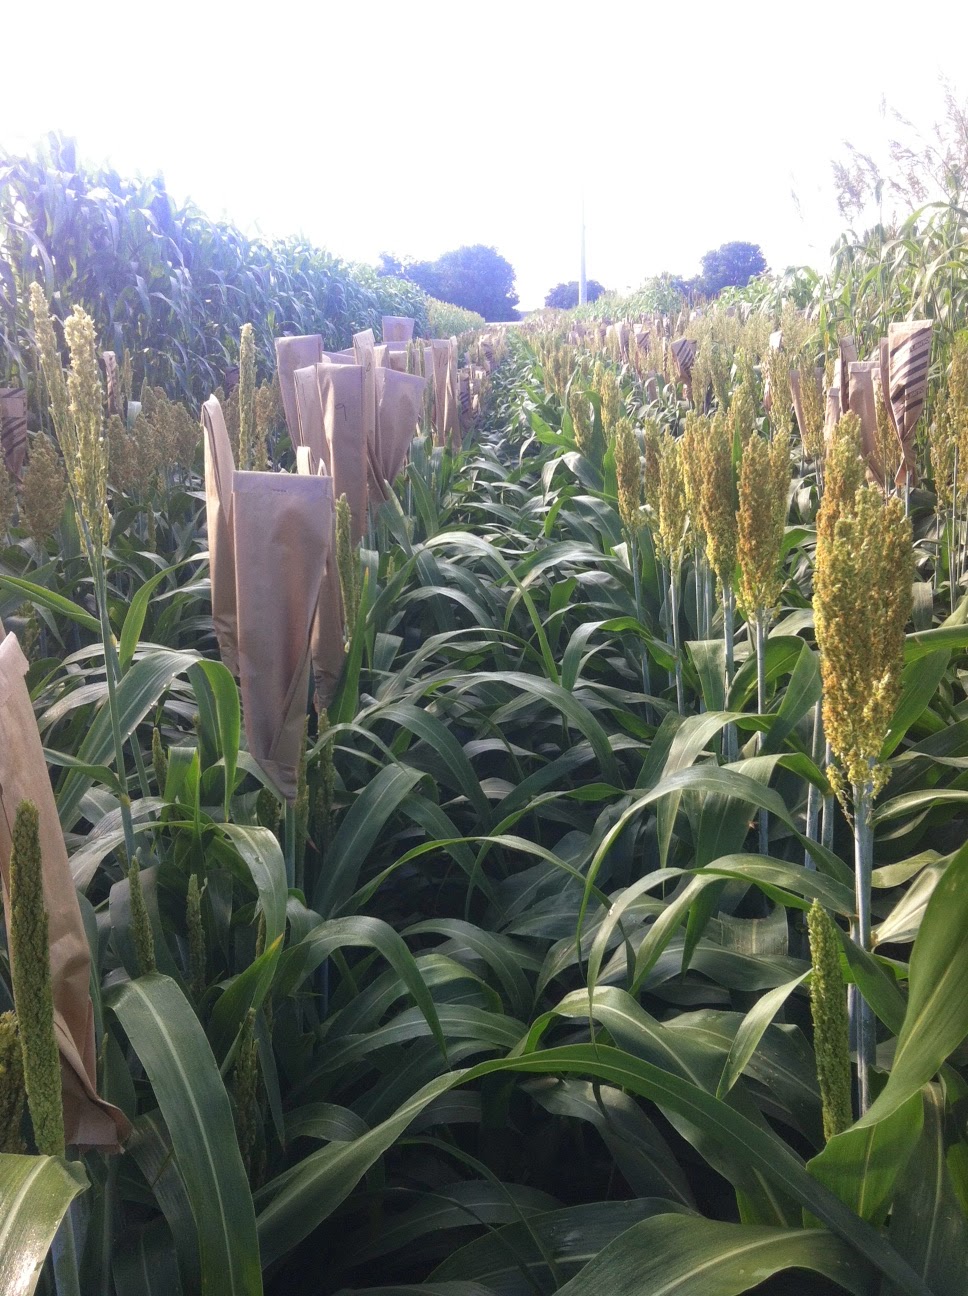
For weeks now the focus of everyday has been on bagging and crossing in two of our fields (check out my last post for details on bagging). The females have been bagged at tip flowering in preparation of crossing. Approximately 3-5 days after bagging, the females will have flowered down and are ready to receive pollen from the males. In some of the tests (the ones I’ve mainly been working in) the rows are done in male and female pairs. The process of crossing is simple: find a male with pollen and shake the panicle into a pollinating bag –we’ve used black striped bags to signify crossing. Then, remove an appropriately dated bag from a corresponding female, place the crossing bag over it, and shake it to distribute the pollen over the panicle.

Pollen (yellow powder)


Pollen is available
No pollen left
You can tell if a male has pollen by flicking the head. If it does, a yellowish cloud will be released. Also, just by looking at the panicle, yellow anthers usually indicate that pollen is present and orange/brown anthers mean that the pollen was already shed.


Each day, new females become available (the females that were bagged 3-5 days previously). However, sometimes the males and females aren’t ready at the time. In such an instance, they say that the nick is off. In a perfect world, though, in the fields I’ve been working in, 25 females per plot would get crossed and one female would be left as a sterility check.

The heaviest crossing has been done and things have wound down considerably. It all has to be done by July 4, so we will be finished with crossing very soon! Next post I’ll discuss my trip to Corpus Christi in which I helped with the Sorghum Improvement Conference of North America. Till then, thanks and gig ‘em!

The crossing block